Master Bathroom Remodel, Blues and Whites
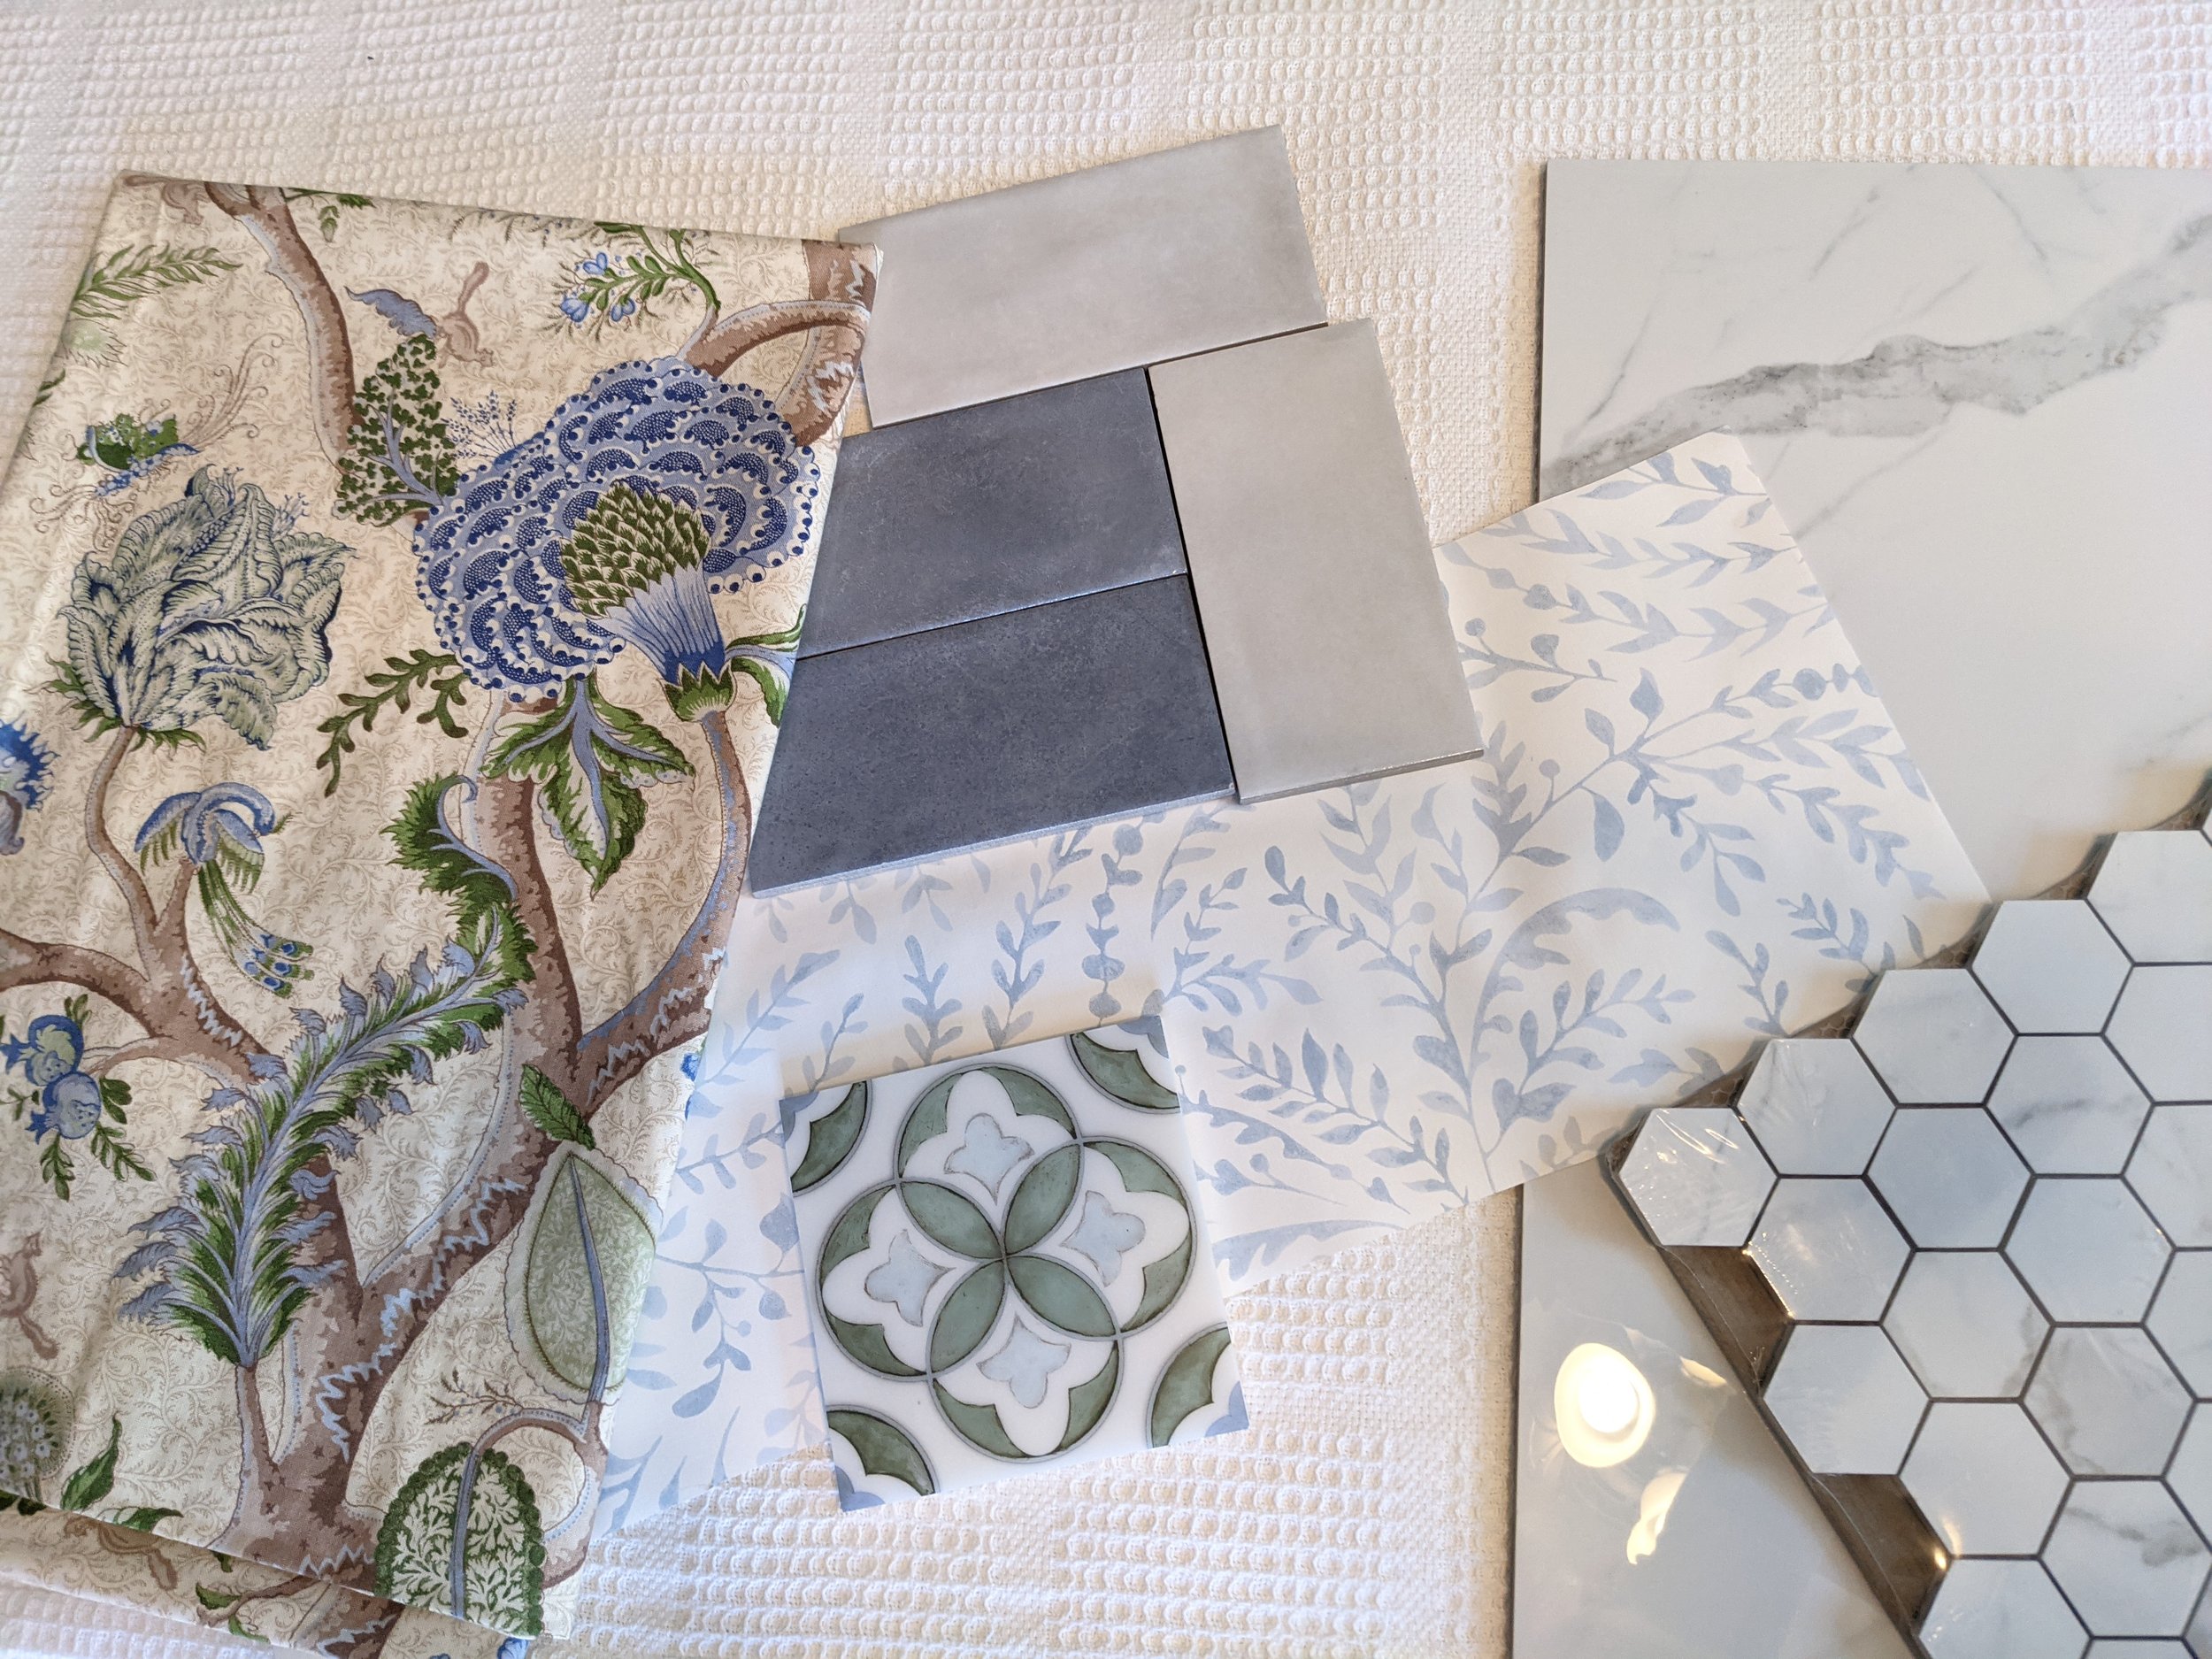
I am so excited to be gutting and remodeling our master bathroom! Our house is almost 100 years old, and it was time to replace all of the plumbing and bring it up to date. So the perfect time for a bathroom remodel! Here’s a quick look at my mood board.
Our current bathroom was dark and not super functional, with broken tiles, a leaking showerhead, and no light in the closed in shower. The grout was growing mold, and no amount of cleaning or bleach helped. I couldn’t even see to shave my legs in the shower. But the square footage and shape was good, and had a ton of potential to work within.
Enter our light and bright design plan :) After not being able to see in our shower at all, we are sticking with mostly white so it will brighten things up and stand the test of time, as well as some blue tile and fun wallpaper.
Let start with the before pictures….


When we first toured the house, I wasn’t too concerned about the bathroom - I was just happy it was tiled and spacious. After moving in though, we made a few initial changes, and noticed all of the problems. The sinks leaked, the floor tiles were cracked and had to be covered with a rug, and the shower had a block glass window that was definitely see through. We tested it, ha. And the window looked out at our outdoor dining area.
So with our initial home renovation, we had the glass window taken out and sealed up. The glass blocks were full of water, and a huge mess. We also took down the rusted vanity lighting and mirror, and replaced those with temporary pieces. We were both happy to be able to shower without a window, but the closed in black shower was so dark, and made it hard to see. The paint that was applied over the grout (probably before the house was listed to make it look better) started to peel off and show the dingy moldy grout underneath. As the mold grew, despite treatment, we decided it was time for reno number two, and a complete bathroom gut job.
We knew we wanted to open up the shower with a glass front & door for light, and brighten up the whole bathroom. The floor was uneven to the point where our bathroom door only opened part way before getting stuck, so we decided to open up the walls and install a pocket door. The blinds were ripped down, because ever since I’ve had kids I’ve been paranoid about any blinds in the house. Also they collect dust and in my opinion look terrible. I was origionally going to keep the vanity and just paint it, but once we were quoted for a new stone top, we decided to just go with a brand new clean vanity.
Here’s our before and after view looking at the shower.. Just to show the difference that taking down a wall makes! Opening up the front wall to the shower and putting in glass adds so much light and makes a huge difference.


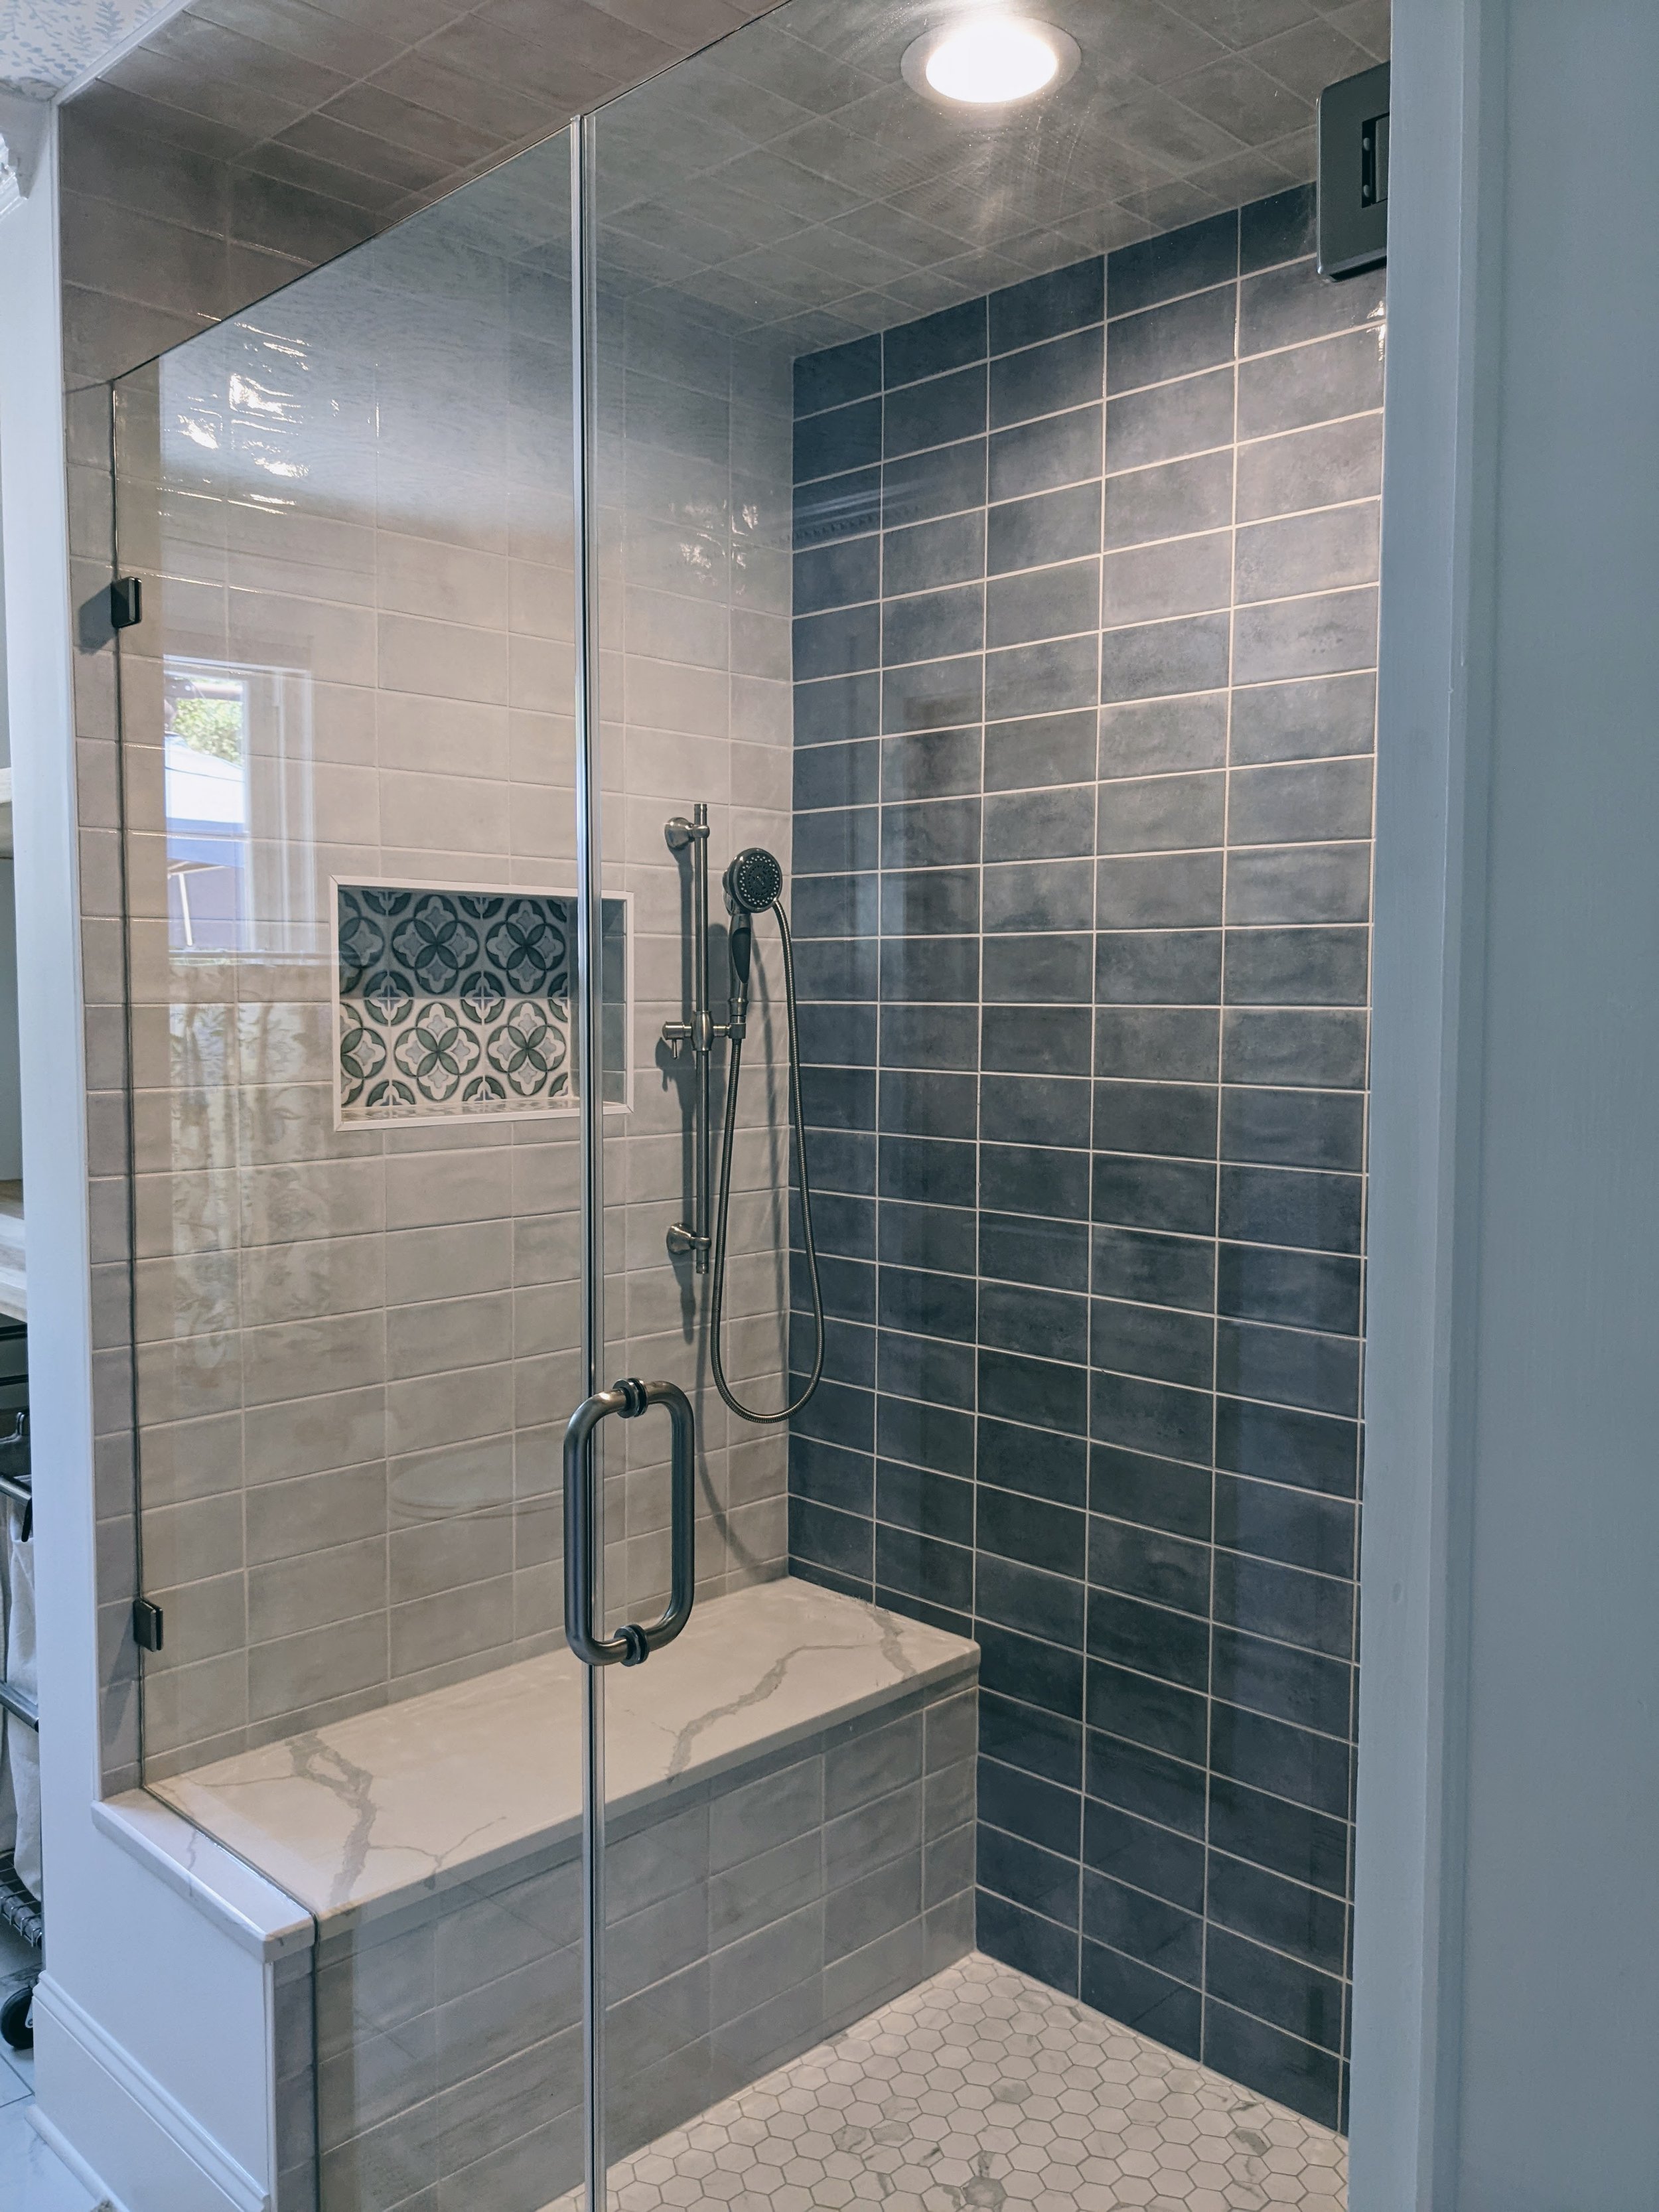
I went to a local tile store, McCullough Tile & Stone to pick out the tile for our bathroom. We ended up settling on blue and cloud white hand painted subway tiles from Italy for our shower, with gorgeous hand painted carerra marble tiles for the niche in the shower.
Our niche tiles are my absolute favorite!!

For plumbing we went to Hughes Plumbing Supply and went with Delta faucets and showerheads. We did a stationary showerhead with a separate detachable showerhead on the opposite side of the shower. Convenient for spraying down the shower, or washing a future potential dog.
The floors were tiles from Lowes that coordinted with each other, and we did a quartz slab for the bench in the shower and the curb. The quartz was sourced locally from L & D Tile & Granite.
I took a design risk, wallpapering the ceiling in a bathroom, but I love how it turned out! We also installed the best possible fan that turns on automatically whenever the humidity is high. So fingers crossed that our wallpaper stays in place on the ceiling!
And the finished bathroom!


Mirrors: Ballard Atoll in Antique White
Sconces: Pottery Barn Pearson Shade Sconce in bronze
Door: Poplar Wood from Pease Doors
Cafe Curtain: Scalamandre Pondicherry
Floor Tiles: Lowes, Statuario Polished Porcelain tiles
Contractor: Chris Jones Construction
Tile: Josh @ Turn Key Tile
Shower Tiles: McCullough Tile & Stone
Wallpaper: Serena & Lily Priano Wallpaper in Sky
I’m so excited to share our before and after pictures! I’ll be sharing more renovation details soon :)
xoxo